Tag Archives: holiday decor

Pottery Barn Knock-off – Silver Wood Elevated Riser

If I had all the money in the world, I would buy everything I wanted at full price.

Not.

I might buy a few things at full price, but quite honestly, I think I would still try to knock some things off on my own.

Not only do I hate paying full price for most things, but I don’t like buying something I know I can make for myself at a fraction of the retail cost.

I call that FUN!

The other day I was shopping at one of my favorite stores…Pottery Barn.

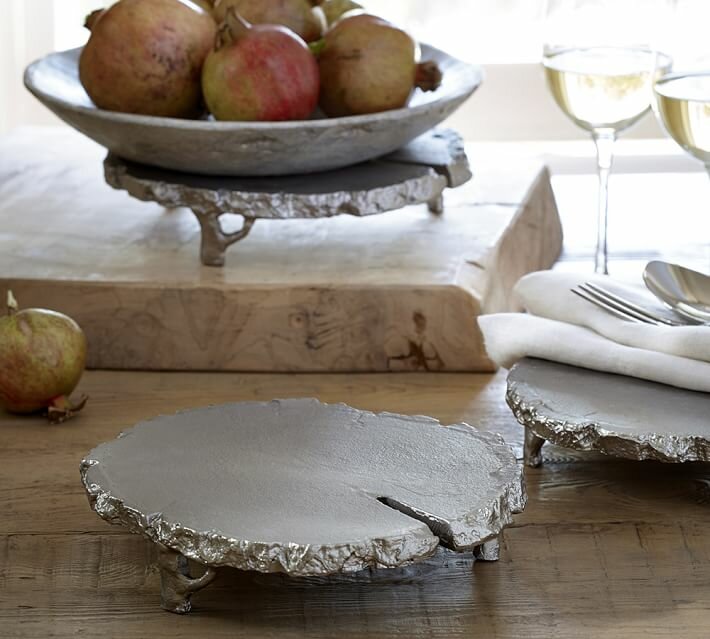
I saw a gorgeous Christmas tablescape similar to this one found on their web site.  

via Pottery Barn

via Pottery Barn


Nestled in among the beautiful linens and dishes and garlands was a cute little silver riser.

img12o

via Pottery Barn


I thought it was fun and funky. Sparkly, yet rustic.  

Then I turned it over and saw the price tag.  $49. 

Ouch.

I knew I could knock it off.

silver wood riser


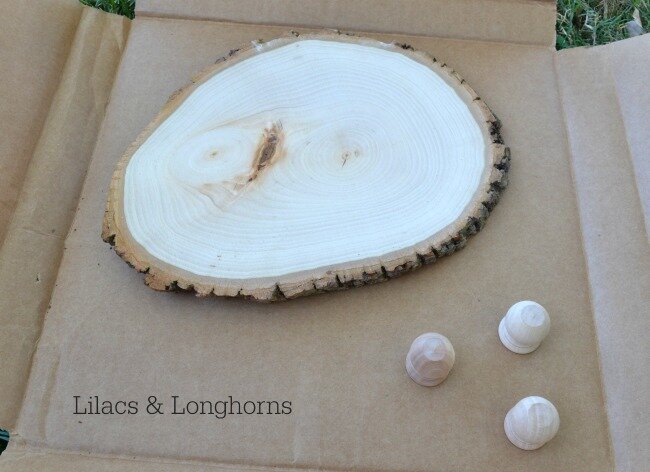
I went to the craft store and bought a wood slice and a package of 3 wooden “knobs.” 

wood slice and knobs


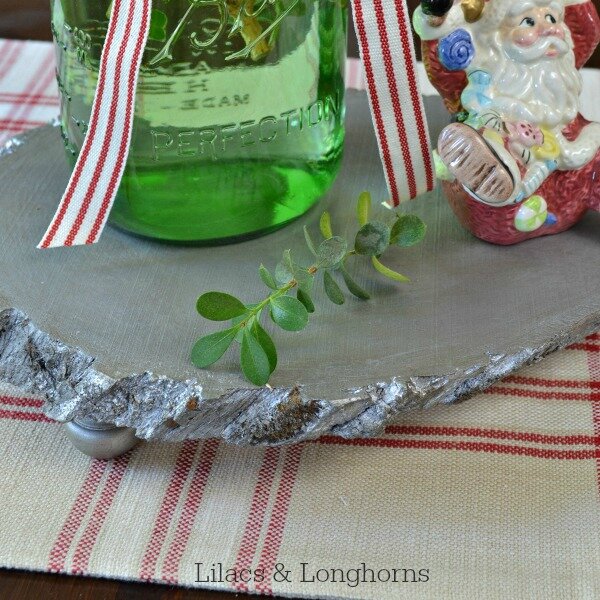
I painted them with silver spray paint, and then I darkened it up with some Annie Sloan dark wax for a rustic look.


A few bits of the bark chipped off when I applied the wax, but I kept it that way instead of going over it with another layer of spray paint.

I think the chippy-ness just adds to the rustic charm.

silver wood riser_wm


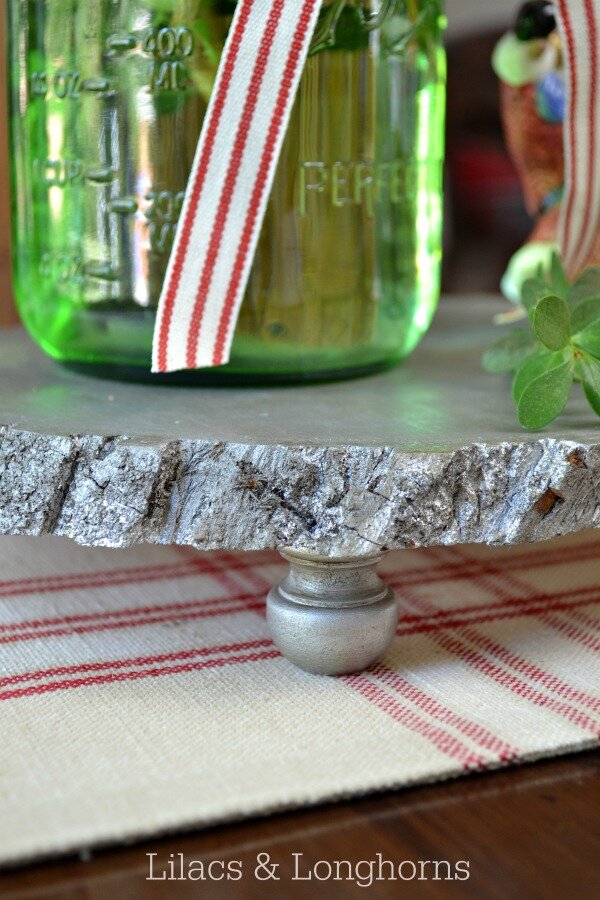
My little “bun” feet aren’t like the real Pottery Barn legs that are shaped like little tree branches, but I’m okay with that.  

tiny bun feet


I attached the legs with hot glue because it was fast and easy. So far they’re holding up great!

Total cost for my project? Around $10.  Love that!

silver wood riser


I created this project as part of the Holiday Edition of the Rock Your Knock-off Tour:

Rock Your Knock Off Holiday edition button


Ready to see some more fun knock-off projects?

 Here is the complete line-up: 


Monday, November 10th
Dio Home Improvements
Snazzy Little Things
Postcards from the Ridge
ConfessionsofaSerialDo-it-Yourselfer
Restoration Redoux

Tuesday, November 11th
mommyiscoocoo
Artsy Chicks Rule
Our Southern Home
Curb Alert!
Sweet Pea

Wednesday, November 12th
Lilacs & Longhorns
What Meegan Makes
H2OBungalow
PinkWhen
Country Design Style
Cupcakes and Crinoline

Thursday, Novbember 13th

House on the Way


Friday, November 14th

H2OBungalow
diy180


An InLinkz Link-up


Thanks so much for stopping by today.

signature

Sharing at:
The Scoop
Savvy Southern Style

Share on facebook | Share on Twitter | Pin on Pinterest

My Christmas Mantel 2014

My kids are soooo happy!

They have been asking and asking and asking WHEN am I going to start Christmas decorating?!

Well, the wait it over!

Yep.  

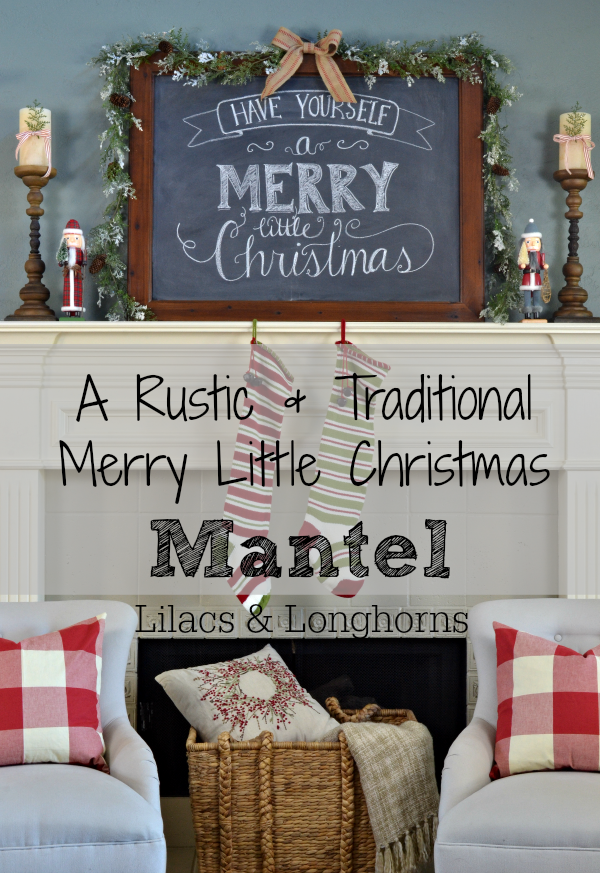
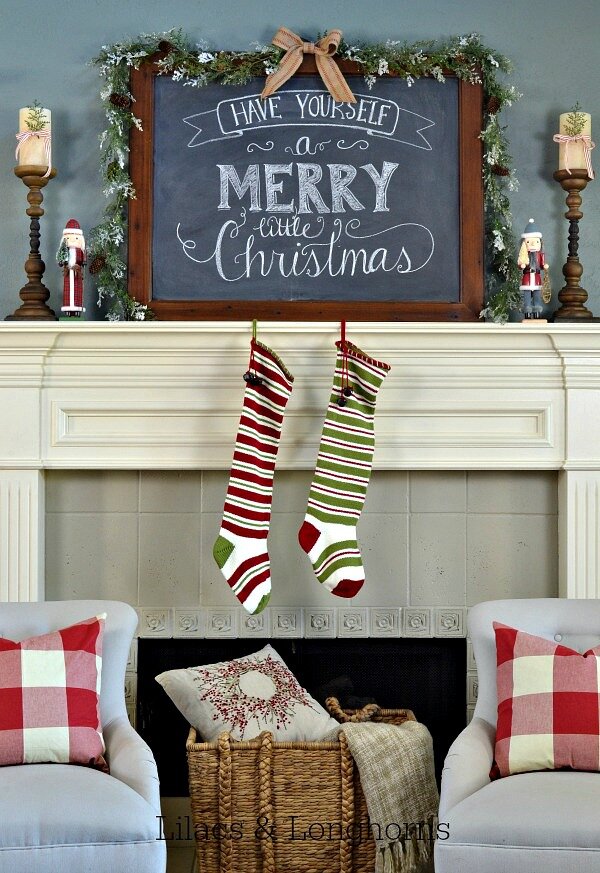
I decorated my mantel for Christmas.
merry little christmas mantel


One space down, several more to go!

I have to say, I think this is my favorite Christmas mantel I’ve decorated in this house.  

It’s a little bit rustic and a little bit traditional.  

Christmas mantel 2014_v2


I adore green and red at Christmas.  I think it will always be my style.


You’ll notice, the decor is pretty simple.

I think it’s my mantra this year — “Simple, simple!”


In year’s past, I’ve had a lot more garland and more “stuff.”  

This year, I didn’t want to fuss or have the mantel compete with the tree that will eventually sit right next to the fireplace.

Did you notice I got a wild hair and exchanged my usual chippy arched window for a new chalkboard I made?

merry little christmas chalkboard


I made it the same way I made the one in my dining room.  I used an open-back frame, some hard board cut to measure from Lowe’s and some chalkboard paint.  So easy!

(By the way, I did the chalkboard writing free-hand, but if you just want to buy one already made I fashioned mine after one found in Dear Lillie’s online shop. If you browse the site you’ll notice that they offer different sizes including a 24 x 36 size which is just a tad smaller than mine which measures 30″ x 40″)
plaid nutcracker_v2


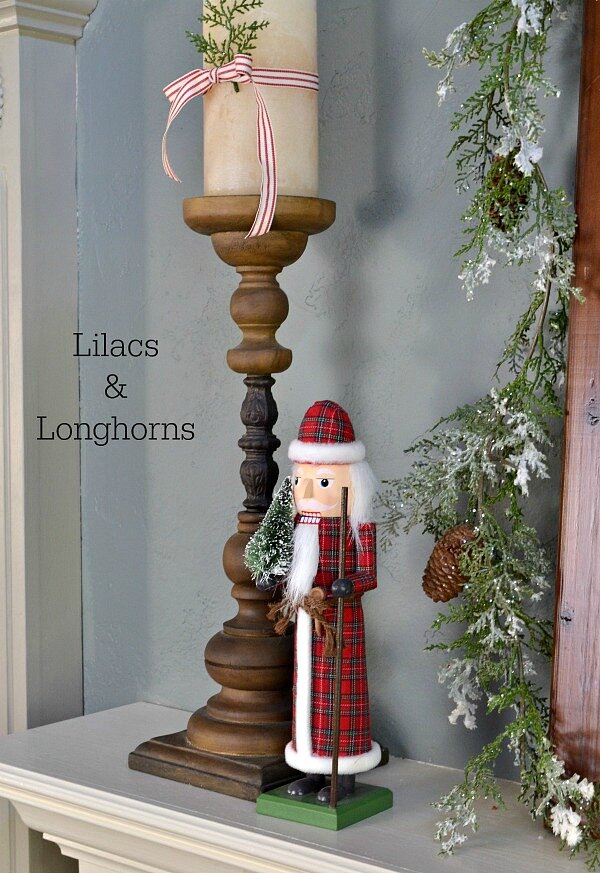
The nutcrackers are a new find from Target.  I couldn’t resist them.  

I love their traditional, yet rustic appeal.
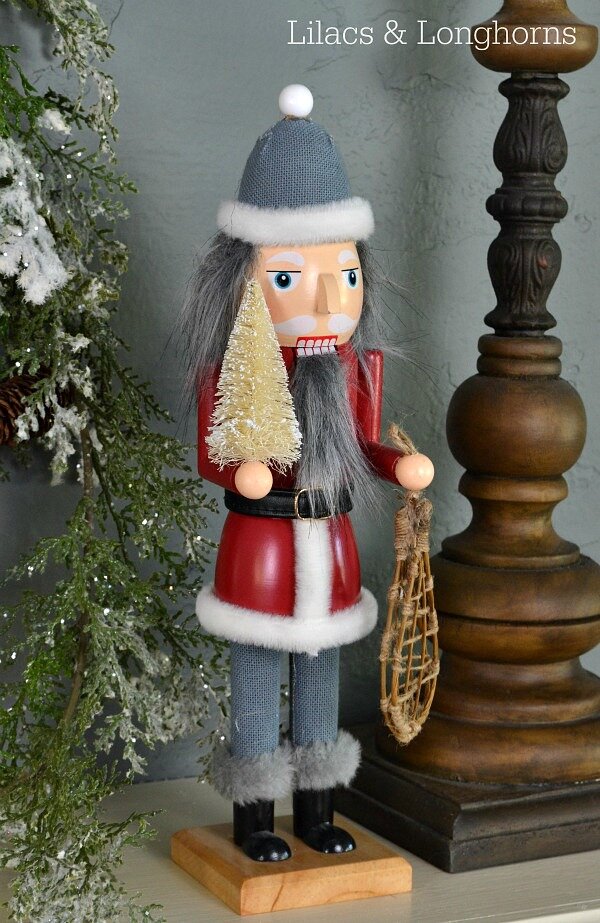
nut cracker_v2


The kids helped me pick them out.

I think we may have started a new tradition — collecting nut crackers each year.  

I think it would be cute to line them all up on the mantel, each having it’s own story of how and where we bought him.

I love traditions like that.
Christmas mantel_v2


Maybe that’s why I love red and green so much.  

It’s tradition.


Full disclosure — I will probably tweak this space once the tree is up and/or all the Christmas boxes are hauled out of the attic, but right now I love it.  Bring on the holiday season!


Looking for more Christmas inspiration?

Be sure to visit all the other blogs on the Christmas Mantel Tour this week.

Thank you to Sonya and Melissa for inviting me to take part in this tour! 

tour graphic  

Today’s Line-up:

Cherished Bliss
Domestically Speaking
Lilacs and Longhorns — you’re here!
Two Thirty Five Designs
The Happier Homemaker
My Soulful Home


To see yesterday’s posts:

Monday, Nov. 10

At Home With the Barkers
On Sutton Place
All Things Heart and Home
Stone Gable
The Woodgrain Cottage


Coming up tomorrow:


Wednesday:

Top this Top That

Refresh Restyle

Town and Country Living

Setting for Four

At the Picket Fence


Wishing you a day filled with joy!

signature

Sharing at:
Savvy Southern Style

Share on facebook | Share on Twitter | Pin on Pinterest

Fourth of July Pottery Barn Knock-off {Tutorial}

I was browsing through Pottery Barn the other day and spotted these:

Pottery Barn Fourth of July burlap stars
 
I had seen them in one of the catalogs, but thought they were even more stunning in person.  They are much bigger than I expected…one is 16″ and the other 18″ in diameter!
 
They’re already sold out online.  In the store, I think the price was somewhere around $19 for the one I saw.
 
I immediately knew this was something I could create at home — especially because I already had everything I needed and wouldn’t need to spend any money.
 

My 8-year-old was up for the challenge and couldn’t wait to get started! (It’s nice having a helper!)
 
 
We began by making a paper prototype and then practiced folding some burlap to see if the fabric I had would fold nicely.  We quickly decided that making the chevron stripes and cuts might be a little more than we wanted to figure out, so we stuck with making a circle.
 
The first step: Cutting the fabric
 
 
When I did my paper prototype I came to the mistaken conclusion that I would need two individual squares of fabric.  Duh!  One long rectangle would have been much better.  I guess my brain is foggy from the rain and humidity!  
 
I cut two 18″ by 18″ squares, so if I were to do it again, I would cut an 18″ x 36″ piece of burlap.
 
Step Two:  Measure the stripes
 
 
I used a ruler to measure the distance between stripes so when I pinched the ends together to make a complete circle all the lines would match up perfectly.  
 
I found that measuring from the outside in worked best.  The center line needs to be dead center.  
 
Step Three:  Painting the Lines
 
 
My daughter decided to get creative and make a line consisting of circles.  It turned out to be the fastest, too!  Our tight-woven burlap really absorbed paint.
 
Also…our center line turned out to be way too thin and didn’t show up well when we folded and fanned the burlap.  I would recommend making this line at least three inches thick, maybe even four.
 
Step Four:  Bake and Eat Oatmeal Cookies!
 
 
Okay…this isn’t a necessary step, but this was the part where we let our paint dry and my daughter was dying to bake cookies, so we did! 
 
I’m only sharing this because the recipe was SO GOOD!!  
It’s from the blog, “Nine and Sixteen.”  You have got to try it!
 
Step Five:  Accordian Fold the Fabric
 
 
(My daughter is folding our test fabric here)
 
Try to get the folds as evenly as possible.  Our burlap held a crease pretty well, but I still ran an iron over it to make sure the creases held.  
 
Step Six:  Tie the Middle
 
 
I used a piece of twine to bind my middle together.  I cut off the excess and then moved on to Step 7.
 
Step Seven:  Hot Glue the Edges Together to Form a Circle


My daughter was at Art Camp when I did this step so I don’t have a picture of doing it, but you just pull your fabric so the ends meet and the fabric fans out to create a giant circle.  Watch your fingers because it’s very easy to burn yourself when doing this step!
 
Step Eight: Hot Glue Twine for Hanging
 
 
The best place to hot glue this is in one of the seams so try to do this at the same time as Step 7.
 
Step Eight: Hang and Enjoy!!
 
 
Even though mine is a circle and not a star, I think it’s every bit as cute as the Pottery Barn version.
 
You can see that I added a center circle because my paint line wasn’t very big.  I just painted and cut a piece of burlap and hot-glued it on to the front.  Easy!
 
 
I love it!
 
Thanks for reading,
Linking up to:
Savvy Southern Style
Marty’s Musings
The Shabby Creek Cottage
 
Share on facebook | Share on Twitter | Pin on Pinterest