-
follow me
-
-
subscribe via email
-
-
hello

-
Welcome! Im Julie and I love classic, cozy living, homemade pie, down-home cooking, organized spaces and hunting for treasures. I enjoy sharing my love of all things home with you!
-
Search this blog
-
-


-
Download the FREE App!

-
Kitchen Remodel

-
Simple Valentine’s Day Craft

-
Valentines Day Flowers

-
Simple Valentine’s Day Gift

-
Valentine’s Day

-
Simple Spring Decor Idea

-
Easy Spring Door Decor

-
Simple Spring Craft

-
Simmering Potpourri

-
bulk storage solution

-
Top Posts & Pages
-
-
Follow me on Pinterest!
Visit Lilacs & Longhorns's profile on Pinterest. -
Find me on Facebook
Find me on Facebook
Tag Archives: grain sacks
No-Sew Faux Grain Sack Ornament
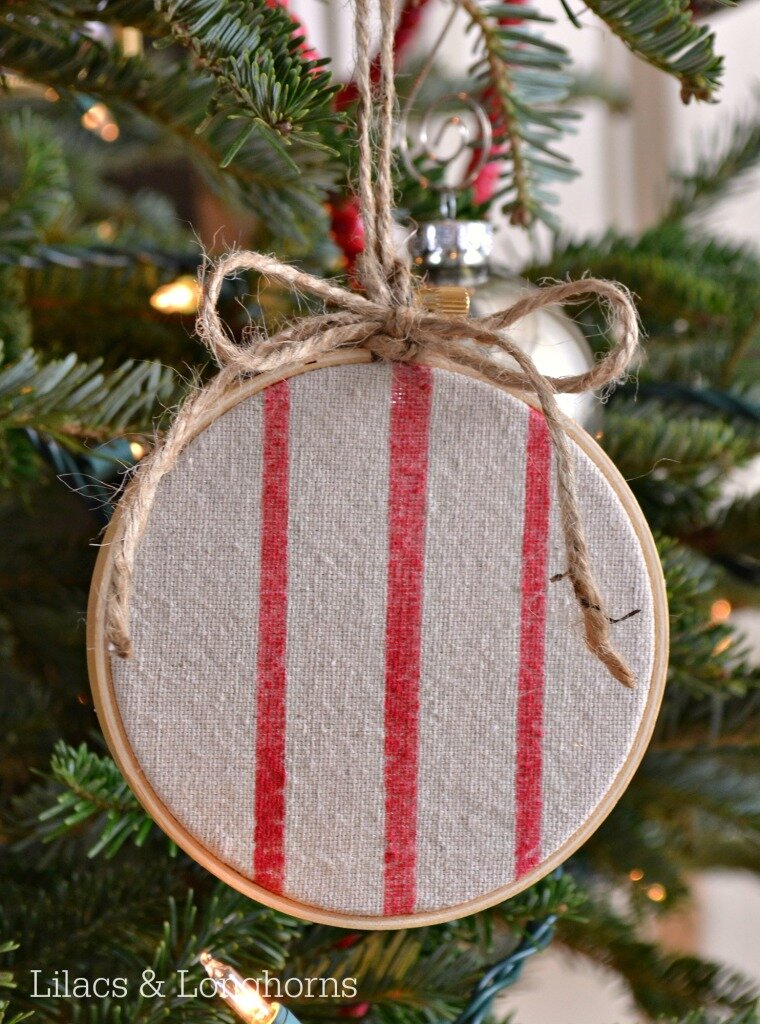
I adore vintage grain sacks. I love the rustic, nubby look, I love the simple bold stripes, and I love that it’s a fabric that goes with just about every type of decor.
The thing is, I don’t always love the price tag. Especially when I want to use it for something seasonal like I did for the project I’m sharing today.
So, what do I always do when I love the look of something but don’t want to pay the price? I make it myself!
I promise, these look even better and more authentic in person. I’m so thrilled with how they turned out!
The branches on our real Christmas tree tend to droop as the season goes on so, after I lost a few breakable ornaments last year, I decided that I needed lighter ones in my collection and these are perfect.
Our big Labrador can wag her tail and knock them off the tree and no harm is done! Haha! Success!
I think I need them all over my tree!
Tutorial
Materials:
- fabric (I used scrap drop cloth fabric but you could also use linen or muslin)
- craft paint
- masking tape
- paint spouncer (affiliate link: Plaid 34106 10-Piece Spouncer Set
)
- small (3 or 4-inch) wood embroidery hoop
- ribbon or twine
Instructions:
Wash and dry fabric if it’s new to give it a more nubby and time-worn appearance.
Then, use masking tape to create a stencil for the lines you’ll be painting. If you want three lines, you will need to use four pieces of tape. Two lines will need only three.
Use the paint spouncer to paint the lines of the fabric. Don’t overly saturate the fabric with paint. My paint is heavier in some areas than others. I like a little bit of the fabric peaking through to give it an aged appearance.
You don’t need to wait for the paint to dry before you peel off the tape. Go ahead and take it off after you’re done painting and then wait for the fabric to dry.
When it’s ready, open up your embroidery hoop and position the fabric in between the two hoops.
Once the fabric is positioned between the two hoops, tighten the hoop using the screw at the top and then trim off the excess fabric with good fabric scissors.
The last step is to add a little hanger by using ribbon or twine. I used hemp twine I already had on hand and tied it to the top of the hoop.
I varied the pattern of the stripes in each ornament I made so no two are alike.
I think these are so cute and if you don’t sew they’re the perfect grain sack craft.
Speaking of grain sacks, today’s post is part of a one-day tour I put together with a few of my favorite blog friends who are masters at decorating with grain sacks.
Please pay them a visit to see what magic they have worked with this wonderful vintage fabric. I cannot wait to see what they’re sharing!
Cedar Hill Farmhouse
Lilacs and Longhorns — you’re here!
My Soulful Home
On Sutton Place
To see a complete round-up of grain sack projects please visit Yvonne at Stone Gable.
Sharing at: From My Front Porch to Yours
Share on facebook | Share on Twitter | Pin on Pinterest


